Netgear EAX15 Setup, Nighthawk App, WPS, LEDs & Reset
Official sources used for this guide
- NETGEAR EAX15 support and downloads
- NETGEAR: Set up a WiFi range extender
- NETGEAR: Troubleshoot access to mywifiext.net
Menus, LEDs and supported features vary by model and firmware. Check the model label and current manufacturer documentation before changing settings.
EAX15 is an AX1800 4-Stream WiFi 6 mesh extender with a Gigabit Ethernet port, One WiFi Name and Smart Roaming support. The supplied quick-start guide emphasises Nighthawk app setup while also offering WPS and web-interface alternatives.
1. Netgear EAX15 Overview
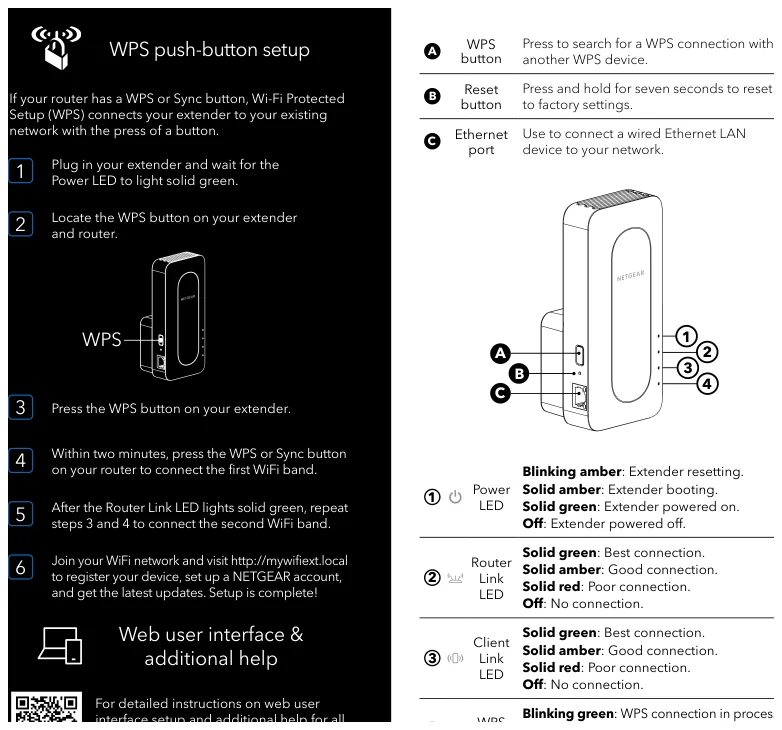
The EAX15 workflow is more app-centric than older AC extenders. The current quick-start guide tells mobile users to join NETGEAR_EXT and finish setup in the Nighthawk app, while the device overview provides a precise seven-second reset action and separate Router Link and Client Link LEDs.
2. Netgear EAX15 setup Guide
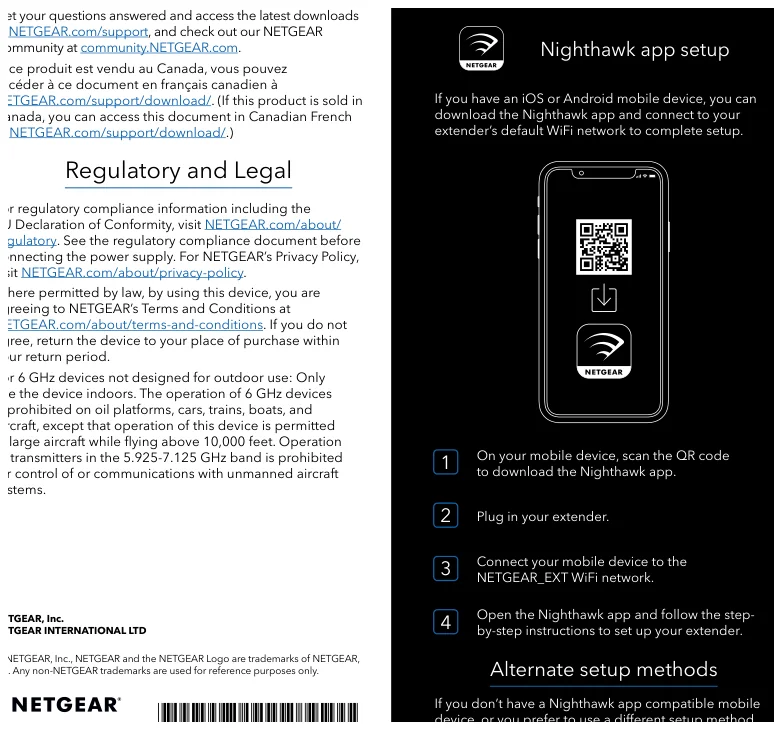
Install the Nighthawk app, power the extender, join NETGEAR_EXT from the phone and follow the guided setup. If you prefer not to use the app, use WPS or the web interface described as alternate setup methods.
3. EAX15 Nighthawk App Setup & Seven-Segment LED
The EAX15 workflow is more app-centric than older AC extenders. The current quick-start guide tells mobile users to join NETGEAR_EXT and finish setup in the Nighthawk app, while the device overview provides a precise seven-second reset action and separate Router Link and Client Link LEDs.
| Feature | EAX15 detail |
|---|---|
| WiFi | AX1800 WiFi 6 |
| Streams | 4 |
| Ethernet | 1 × Gigabit |
| Primary setup | Nighthawk app |
| Reset | Hold Reset 7 seconds |
4. Netgear EAX15 Login & Local Management
Use the Nighthawk app for routine management. Browser management can also be used where offered by the extender web interface; connect locally to the EAX15 before entering any administrator credentials.
5. How to Reset Netgear EAX15
Press and hold the Reset button for seven seconds. The Power LED blinks amber during reset, then the unit reboots and returns to factory settings.
6. Netgear EAX15 Firmware Update
Use the Nighthawk app or official NETGEAR support workflow to check EAX15 firmware. Keep power stable during installation and do not upload firmware intended for a different EAX revision.
7. Netgear EAX15 Troubleshooting
8. EAX15 app onboarding and LED checks
Use the EAX15 link/placement indicators before changing passwords or performing a factory reset. A weak router-to-extender link can make otherwise correct setup credentials appear unreliable. If a client connects to EAX15 but Internet access fails, verify the router uplink first, then check DHCP/gateway information on the client. A connected WiFi icon only confirms the local radio association.
EAX15 Model-Specific Quick Diagnosis
This AX1800 WiFi 6 mesh extender guide uses the following checks to keep EAX15 troubleshooting distinct from other extender families.
| Observed symptom | EAX15-specific next check |
|---|---|
| WiFi 6 client falls back to WiFi 5 | Check client capability and router security/channel settings; fallback does not prove the EAX15 is defective. |
| WPA3 router is not detected | Temporarily use a compatible transition/security mode, update firmware, then retest WPA3 support. |
| Gigabit client has low speed | Measure wireless backhaul separately; an Ethernet link cannot exceed the EAX15-to-router connection. |
| App cannot discover the extender | Disable mobile data/VPN and join the extender setup network before restarting the app flow. |
9. Netgear EAX15 FAQs
What is the main setup method for EAX15?
Install the Nighthawk app, power the extender, join NETGEAR_EXT from the phone and follow the guided setup.
How do I log in to EAX15?
Use the Nighthawk app for routine management. Browser management can also be used where offered by the extender web interface; connect locally to the EAX15 before entering any administrator credentials.
How do I reset EAX15?
Press and hold the Reset button for seven seconds. The Power LED blinks amber during reset, then the unit reboots and returns to factory settings.
How should I update EAX15 firmware?
Use the Nighthawk app or official NETGEAR support workflow to check EAX15 firmware. Keep power stable during installation and do not upload firmware intended for a different EAX revision.